Thursday, December 27, 2012

Treats for the Birds


For years, when the kids were younger, we had a family tradition between Christmas and New Years Day. Granny would arrive with a bag full of pine cones she had collected from her yard in the fall and we would begin mass production of bird feeders. Each person had a job and an assembly line was formed. Bird seed and peanut butter ended up everywhere, but by the end of the day we had trays of luscious feeders adorned with red yarn hangers.
 
 
Distribution was a big deal as the trays were carried ceremoniously out to the yard
to decorate a tree for the birds.
 

On the years we had a real Christmas tree; we would "plant" it in a snow bank or set it in its stand in a bird friendly place and decorate away!


Then as the days passed, we spent hours at the window watching the birds
 enjoy their "Christmas" tree gift from us.


Pine Cone Feeder – Directions


Tie a piece of brightly colored yarn around the top of a pine cone. We like to use red because it makes the tree look more festive after decorating it for the birds. But, any color or combination of colors may be used. Make a loop from the yarn to use as a hanger. Fill a 9x13 cake pan or large non-breakable bowl with bird seed. With a butter knife, spread peanut butter on all sides of your pine cone and then roll it in the birdseed. Push the covered pine cone deeply into the birdseed so the birds have a thick layer of seed to pick from.
A finished bird seed pine cone BIRD FEEDER


Alternative: If you just want to make a couple of pine cone feeders you can hang them outside one at a time on a bird friendly tree branch or garden hook in a place easily seen from a window.


Watch the birds enjoy this special treat!


Another Bird Feeder Idea:


  • Orange-Half Feeder Directions
Cut an orange in half. Scoop out the pulp for a salad or snack. Fill the skin with bird seed. Set outside in a bird friendly area.


Friday, December 21, 2012

Fascinating Flashlights!


Today is National Flashlight day... who would have guessed?

I stumbled across this tidbit of information when looking for flashlight visuals to go along with today's miraculous, magical moments activity ideas.  In addition to the safety tips provided in this web post, try the fun activities that follow from Hidden Splendor!


"When : Always December 21
Don't be left in the dark on National Flashlight Day. The basic requirement for this day, is a flashlight and good batteries. Flick the switch, and you can put anything into your spotlight.

We'd like to shed a little light on this special day. National Flashlight Day arrives on Winter Solstice, which is the shortest day...and longest night.... of the year. "Watt" that means, is that there's lots and lots of darkness. With all of those dark hours, your flashlight is apt to get a good workout.

You never know when you will need a flashlight. National Flashlight Day is a good day to make sure you and your family know where the flashlights are. Test each flashlight, to be sure the batteries are good. When in doubt, replace the batteries with new ones. It is also a good idea to put a flashlight in your car.

Did You Know? The flashlight was invented in 1898 by Joshua Lionel Cowen. However, this wasn't his greatest invention. He also invented the Lionel train."

Source: 
http://www.holidayinsights.com/moreholidays/December/flashlightday.htm


 Flashlight Activity Ideas from Hidden Splendor

  • Flashlight Magic

Using a high intensity flashlight, turn it on and hold it up to your palm.   Look at the back of your hand.  What do you see? How well does the light shine through your hand?  Will the light shine through a blanket or pillow? Experiment with other items.
 
  •  Flashlight Constellations and Shapes

Cut out a circle from black construction paper the same size as the lens on your flashlight.  Cut out shapes or punch holes in the piece of paper.  Try tiny cookie cutters (depending on the size of your flashlight) or make your own creations.  Using a small hole punch or an ice pick would also help create fun designs.  Tape the paper onto the lens of your flashlight and turn it on.  Check out the shapes or constellations you can make on the wall or ceiling.
  •  Light Beams Chase

Several people turn on a flashlight, turn off all the lights in the room and lay on the floor or a bed. Then take turns "chasing" flashlight beams across the ceiling (or on a wall).

Photo source: 


  • Dancing Light Beams

Play your favorite music and make up a flashlight beam dance to the beat. Create a dancing performance around the room or on the ceiling.
Photo Source:
http://blissfullydomestic.com/family-bliss/parenting-family-bliss/flashlight-fun/34619/

  • Undercover flashlight

Who can forget the fun it is to read under a blanket with a flashlight?  This can be done in bed or under your home-made tent inside the house.  Supplies needed?  a large blanket, a few chairs or pieces of furniture to drape your blanket over and a supply of your favorite books, flashlight, pillow and sleeping bag or blankets.  Of course this can be done on an outdoor camping trip too.

  •     You are in the spotlight!

Make learning great fun.  Gather up the flashcards your child is trying to learn - multiplication tables, addition, subtraction, sight words, alphabet, numbers, etc.  Lay the flashcards out on the floor in a random pattern (right side up for an easier version, upside down to add mystery)  Use a flashlight to highlight a card.  The child must solve the problem or name the item.  If they are correct they get to collect the card.  If not, tell the correct answer but the card stays on the floor.  Revisit that card until the child can get it correct immediately.  Continue shining your flashlight onto the remaining cards one at a time on the floor.  When all the cards are picked up the game is done, or you can play another round. 


  • Catch me if you can!

Turn your flashlight on and off in different spots on the floor and let your child try to "tag" with their foot or hand on the light before it moves.  Take turns with the flashlight.

Photo Source: http://artandsoulpreschool.blogspot.com/2012/03/flashlights-and-moon.html


  • Tag Flashlight

This game is played outdoors.  Kids run around and try to escape being "tagged" by a flashlight beam.  Everyone gets a flashlight or they can take turns being "it"  seeing how many people they can get out when "caught".

Revise this game for indoors.  Shine a flashlight on furniture and walls and let kids try to "catch" the light spot before it moves or goes off.


  • Light Messages

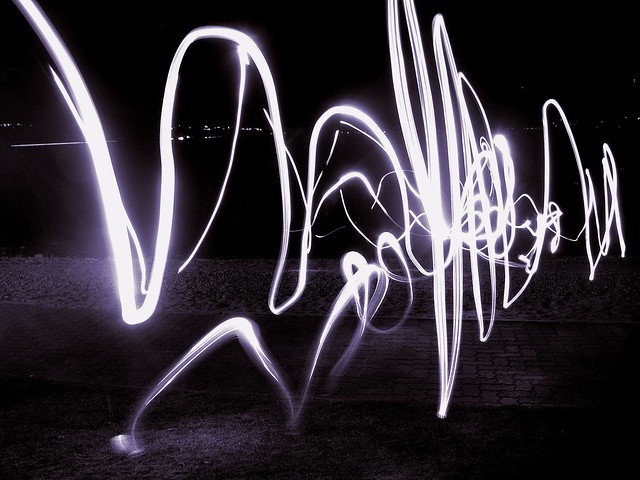
Use a flashlight to write a word, draw a shape or number.  The other people (person) playing with you tries to guess what you wrote.  Take turns writing and guessing.  Wouldn't this be a fun way to assign chores for the day?  hmmm... 

  • Morse code

Use a flashlight to send Morse code messages to each other across a dark room or across the lawn.  What great fun this would be while camping in the backyard. 

Siblings sending messages after "lights out" would also be fun!  Parents, build this into your night time schedule. You have more darkness today than any other day of the year!


Since today is the shortest day of the year, it really isn't so late when it gets dark. 
So, plan some flashlight fun to occupy the darkness.


Wednesday, December 12, 2012

Hand/Foot Print Angel


At this time of year, our mind frequently thinks about angels. 

Angels can be found hanging on Christmas trees, sitting on shelves as decoration, located in nativity sets, arranged in yards illuminated with lights, hanging on walls and on the front of Christmas greeting cards.

 
Angels play a large part in the Christmas story.  An angel told Mary she would give birth to the Christ child.  Angels told the shepherds that baby Jesus had been born.  An angel came to Joseph in a dream to warn him of the evil plan of King Herod and again to tell Joseph when it was safe to return to the land of Israel.  You can read the complete story in Matthew 2 and Luke 2 in the Holy Bible.
 
With angels playing a central role during the holiday season, it is only natural to combine it with the little "angels" in your life.  This project is perfect to capture the size of your children this year.  Make sure you have them sign and date their creation.  It is fun to look back at the size of their prints and how they sign their name in years to come.


This would be a treasure to Grandparents on the front of a shirt or sweatshirt.  Parents and relatives would love to have a framed "angel" or card with their loved ones prints on the front. 
 
Create your angels on paper or fabric.Use poster paint on paper or fabric paint on fabric.  If your creation is on paper, a piece of garland or a pipe cleaner make a great halo.  On fabric a piece of gold cording or ribbon sewn on make a lovely halo.
 
Have fun making a host of heavenly angels this holiday season!
 

Monday, December 3, 2012

Holiday Handprint Wreath


Handprints can be combined around a circle to make a wreath.  Fingerprints can be added for berries.  This creation can be made on paper, a decoration on the front of a shirt or on a fabric banner to hang on the wall.  What a great way to keep memories.  Make sure you sign and date your creation!
 
Materials needed:  Poster paint if creating on paper
                               Fabric paint if creating on fabric

Tuesday, November 27, 2012

Entertaining Shadows!


Entertaining Shadows


Sooooo big!

 Copy Me!  What do you see?


Dinner was done and I was cleaning up the kitchen.  Sounds of visiting and happiness filled the air.  And then, giggling and laughter swirled around me elevating to a level that just had to be investigated.  What did I find?  The end table lamp shade had been removed and a shadow show was in progress.  Aunties can be so much fun! 


Animals appeared and "copy me" games transpired. They ended up rolling on the floor in laughter and hugs. Such great memories and so much fun happened as our "dessert" for the evening. More than our stomachs were filled that night. 

Alternative Ideas:

Put your hand in front of a flashlight beam or lamp without a shade to make shadows on the wall or ceiling. 
 
  • Animal Shadows
 
A fist with two fingers held up straight can be a hopping bunny. 
 
Movement of your thumb snapped up to your fingers becomes a crocodile. 
 
Fingers interlaced become flying birds.
 
What other animals can you create?

 
  •  Shadow Object Guessing Game
Hold up different ojects and guess what it is!  Move the object closer to the light and then farther away from the light to make the object bigger and smaller. 

How does the distance from the light change the shape of the shadow?

  • Silhouettes 
Tape a piece of paper onto the wall over your shadow.  Hold really still and have someone trace your silhouette!  Use black construction paper and white chalk to outline your shadow for a black silhouette.  Or, use white paper, trace your shadow and then color it in with your hair color, etc.  Cut out your silhouette and glue it onto a piece of  construction paper in your favorite color.  Don't forget to sign and date your masterpiece!
 
· Have a shadow puppet show 

Animals or paper shapes (made out of cardboard or construction paper) glued to Popsicle sticks  or straws held in front of a flashlight beam makes shadows on the wall. Make up a story as you go along or perform your favorite story book.
 
 
Shadows are a quick, easy, inexpensive was to create some magical fun moments with your family!
When it gets dark tonight, why not give it a try?

Monday, November 19, 2012

Leaf Fun!


Raking Leaves Becomes a Family Affair Full of Fun!

 
Raking leaves does not have to be a dreaded activity!  Kids love to help with family chores. 
Provide each child with a child size rake and let the fun begin!
 
Who can make the biggest pile in five minutes? 
 
Who can find the prettiest leaves to rake? 
 
Section off the yard and see who gets their section raked first.  Then count to three and take a flying leap into your pile of leaves.  This is the best part of raking leaves... jumping and playing in the pile! 
 
Have a leaf tossing "fight". 
 
Make it rain leaves. 
 
Stuff white trash bags until full and round.  Then decorate the outside of the bags. Why not make a catepillar for your yard?  Can you think of other things to make with your "leaf balls"?
 
Playing in leaves is an open-ended activity for all ages. Play for a few minutes or for hours!
The choice is yours. No matter how long or how old you are,
Fall leaf play is sure to provide lots of smiles, laughs and fun!
 
Follow up the outside fun with a round of hot cocoa or hot cider.
 

Other leaf ideas...

 
Save the prettiest leaves out of the piles to create pictures with them inside. 
 
Or, press your leaves between newspaper or in an old magazine. 
When dry, glue leaves onto poster board, then cover with clear contact paper to make Fall place mats.


Personalized Turkey Print

Turkey Hand Print


Each year when my kids were little we would make a hand print turkey.   The boys would write their name under their creation and we would add the date.  These fine feathered fowl would be transformed into a holiday greeting card and away it would travel over the miles to brighten the face of their Granny.  Granny saved these cards for years creating a flock of turkeys of varying sizes on her refrigerator door.  We didn't plan it, but it turned out to be a wonderful way to watch and remember the growth of our children. 
 
This week I plan on pulling out the paper, markers and maybe even paint or ink pads
 to continue the tradition onto the next generation of children in our family. 
I foresee a flock of turkeys being created to decorate my refrigerator!
 
Traditions are a wonderful component of building strong families.  Spending time together, interacting, laughing and communicating helps cement the bonds of family relationships.
 
Why not add turkey hand prints to your family traditions?
 
 
Supplies Needed:
 
Paper - size and color are your choice
Markers if you want to trace your hand print
Finger paint or ink pads if you want to stamp your hand print
Crayons or markers to add  a turkey beak, feet, wattle etc.
 
Directions:
 
Trace or imprint your hand print onto a piece of paper with your fingers spread out  wide.  The fingers become the turkey's feathers.  Your thumb is the turkey neck and head.  Use a thumb print for the turkey wattle.  Or, use markers/crayons to add the feet, eye, wattle, feather colors, etc. 


Variations to try:
 

Thumbprint Turkey


Thumbprint turkeys . . . Cute Kids craft! Would be cute place cards
 
http://thecharmedmom.com/2010/11/thanksgiving-craft-fingerprint-turkey-cards.html                                         
               

Hand/Foot Print Turkey


Note: 
 
Turkeys should be allowed to be any color, depending on your child's preference. 
In reality, they DO show a rainbow of colors in the wild when sunlight hits their feathers! 
 
When my oldest son was in kindergarten, the teacher refused to hang up his turkey because he colored it "wrong".  He had made a beautiful purple turkey with green legs.  His self esteem took a big hit that day, when he was not included with the rest of his class.  So, no matter what color your child interprets their turkey to be, hang it up with pride and joy.  Let their creativity be expressed in any form they wish to take.  Let them think "out of the box" and enjoy the fruits of their efforts!

Monday, November 5, 2012

Leaf Person/Family

Fall is the perfect time to explore the beautiful, bountiful treasures of nature.       


Give each child a bag to pick up their favorite Fall treasures, then head outdoors to explore.  After your expedition, come inside and have a show and tell of what each person found.  This is a great time to share feelings and thoughts about why each person chose their items.  You will discover the inner thoughts and some of your child's values, too.
 
There are many things you can do with the natural items that you found.
But, one idea is to make pictures of leaf people.

Leaf people

Sort through your bag of treasures. 

Lay out the items in piles of different sizes, shapes, textures and colors.  

Plan your design.

Arrange leaves onto a piece of paper of your choice into people shapes.

You can also use your natural materials to make objects around your people: sun, trees, grass...

Glue on your design.

  Markers, construction paper or foam pieces can be used to make eyes, nose and mouth.

 
Have your child make a picture of the whole family using leaves and outdoor treasures. 
Don't forget the family pets in your creation.
 
Be sure to have your child sign and date this creation! 
 

Monday, October 29, 2012

Considerations When Planning Children's Activities


As you consider activities with your children remember... 


  •  Always keep your child's age and stage of development in mind before doing an activity.

  • Modify as needed, for your child's skills and the different ages of your children. 

  • Custom design activities around your own family's interests, values, skills and talents.


  • Safety and supervision must always be a priority!


Monday, October 22, 2012

Jiffy, Nifty Bean Bags!


Jiffy Bean Bags


Quick bean bags can be made by filling a plastic Ziploc bag with rice, beans, barley or popcorn.

Or, just grab a bag of beans from the pantry and have a few minutes of fun. 
 Put it back in the cabinet when you are finished and it will be waiting on you for the next meal.


Grab the empty can from dinner preparations or use a cooking pot, empty trash can or basket.
  Any clean, empty container will work for your bean bag target. 
Or, tape a picture on the floor
or mark a spot with a masking tape "X".

 Look around, what can you find?
Toddlers get a challenge by tossing into a cake pan of any size, due to its wide opening. 
The older child is challenged by containers with smaller openings.
Keep moving the throw line back as success is achieved.

Rule of thumb: 

the younger the child,

the larger the opening and the closer the throw line should be to the target. 

The older the child,

the smaller the opening and the farther away the throw line can be from the target.


Shoulder Pad Bean Bags


Have a little time to whip up a bean bag that will last through many play times?

 If you have taken out shoulder pads from one of your blouses/tops,
these can be sewn together with beans, rice or barley inside.

Shoulder pad bean bags are fun because they are different colors, patterns, textures and sizes.
 Their fun shape is held easily in a little hand.


Playing catch with a bean bag is lots of fun and doesn't hurt if you miss and get hit. 
This is great for the beginning catcher.
Bean bags are also fun to just hold and squish. 
Because of the different textures, colors and sizes, shoulder pad bean bags can also provide a nice quiet activity for the child that needs calming down.  The manipulation and textures seem
to have a calming effect when used in this manner.

Tuesday, October 16, 2012

Tin Can Fun!

One of the best investments I ever made, was in the purchase of a hand operated can opener
 that left smooth edges on my tin cans after opening.  Not only did it spare me occasional blood shed, it provided containers that could be used for a wide variety of purposes.

Tin cans can be used to store pencils, markers, paint brushes, crayons, small toys etc.
It is fun to decorate, paint or cover the outside of your can, personalizing it for its intended use.
You can cover cans with wrapping, construction, colored or contact paper, even fabric.

But, if you want to use an empty tin can for a quick,easy, fun activity consider using it for a...

Ball Toss Game

Materials Needed:

1.  An empty tin can or combination of cans.

2.  Something to toss...
     -  rolled up sock
     -  a ball of foil
     -  marshmallows
     -  a paper ball (squish up a piece of paper into a tight ball)
     -  a bean bag
     - or any kind of ball (tennis, golf, rubber etc.)  

Ages:  anyone who is interested age 2 - 92... really!
           School age, Tweens and Teens will be able to think of more complex rules and challenges.

Remember... the younger the child the larger the opening should be; and, the closer the throw line should be to the can.


Playing Options

1. Line several cans up in a row. Decide on a throwing line.
    This can be a line in the tile or a piece of masking tape placed on the floor.

2. If using more than one can, use a rubber band to hold your cans together.  Three rubber bands
    added at the top, middle and bottom give your target more stability.

3.  Points can be assigned to each can, if desired. Write the number of points on each can.
     Use all the same size can, or for variety use three different size cans, to make the game
      more challenging.

3. Lay a can on its side. Use a ruler or yardstick to "putt" your ball into the can.

Can you think of other ways to play?


Monday, October 8, 2012

Overlooked Treasures!

I left home late last night.  I was in a hurry for a meeting. Then, a rainbow tapped on the side mirror of my truck and followed me all the way to town playing hide and seek behind the curves of the road. The sun shone a spotlight on all the trees new Fall outfits and created a golden glow that warmed my soul.  I was glad I was late. Otherwise, I would have missed
yesterday's present from God.

Double rainbow.  This photo was pieced together with two shots that were taken in Story City, Iowa

And so it goes so many times in the "screen era" that we live.  Hurry, rush, text, face book, twitter...

Today, stop and take a breath!  Look around and see what "presents" you are missing.
Find the simple joys, amazing beauty and overlooked treasures that whisk by you each day.


Ideas with a kid twist.

1.  Go on a scavenger hunt.  Shout out things that are cool or you never noticed before.

2.  Set a timer and give everyone so many minutes to come up with as many things as they can find in that length of time.  Then take turns sharing with each other the overlooked treasures that are around you.

3.  If you are driving, the person riding "shot gun" is the treasure spotter.  This person is the look-out to spot hidden treasures with only things seen in the side vehicle mirror!  Switch turns, and now it is the person in the back seat's turn to spot treasures only seen from the side window.

4.  Go for a walk down the road/street or in a park.  Decide on stopping points as you move along the trail.  At each point stop and share all the different things people have seen.  You might even have to backtrack when someone says, "Where?  I didn't see that!"  Or just enjoy the walk, pointing out things as travel along.

5.  Find a comfortable place to sit (couch, deck/patio, yard etc)  Just sit and look around you.  What do you notice?  How do you feel?  What do you see?  hear?  smell? 

6.  Get comfortable in an outdoor location with a pair of binoculars.  What can you find?  How do things look differently than viewed with the eye alone? 

Maybe you would like to write in a journal about what you see and how you feel about it;  or, draw pictures/sketches of the treasures you find.

What else can you think of?

Good Luck with your treasure hunt!


Tuesday, October 2, 2012

Foil Sculptures


Foil has many uses.  But, one of the most interesting, easy and surprising uses is for sculpting! 

Sculptures, animals, people, jewelry, necklaces, earrings, boats... anything your imagination
 can think of, can be created with a piece of foil. 

Push it, squish it, fold it, bend it, twist it, mold and cover with it

...and create to your heart's desire.


School- age kids and Teens (yes, teenagers!) seem to really love this activity.

a bracelet topped off with a "rose", made by a teen girl.
Modeling a bracelet,  with a "dove" sitting in the front and a "flower" in the back.

This boy couldn't wait to see if his "boat" would float!


Wishing you lots of foil fun!


Monday, September 24, 2012

A Piece of Paper Magic!

Paper Fans

Chances are that most of you have made a paper fan at some point in your life. 

Paper fans are quick, easy and fun! 

Try these unique materials for your next fan.

Computer Paper Stationary - Left over pieces from your last project


Travel magazines - When you get home from a trip, before you recycle the travel magazines, flip through and tear out the maps and full page pictures to use in the construction of your next fan.
Magazines - Before recylcing your magazines, tear out the pages with full color photos.  This will personalize your fan with your favorite hobby or interests. (trains, dogs, horses, flowers, fishing etc.)

Maps-Got an old map? Cut it into 8 1/2" x 11" pieces and use to construct a  a very unique fan.

Wrapping Paper- Use paper that is heavier, or foil,  cut into 8 1/2" x 11" pieces.

Photos printed on the computer - personalize and experiment with your favorite picture or group of pictures.  After you fold the fan, what does it look like?

Colored construction paper- decorate with markers or your favorite stickers.
White computer paper- Colored pencils, crayons, water colors, glue and glitter, stickers etc. can be used to decorate both sides of  the 11 x 8 1/2-inch paper, personalizing your fan.   

 No matter what source you use for your paper fan, the creation procedure is the same.

1.  Beginning at the short side, fold over and under, making  approximately 3/4 inch wide strips,
     down length of the paper.

2.  Hold one end of the folded paper firmly and staple together.

3.  If desired, you can punch a hole through the stapled end, then tie colored ribbon or yarn through
     the hole to make streamers for the end of your fan.

4. Hold the stapled end of your fan, flip your wrist rapidly so that the fan creates air movement...

relax and enjoy the breeze!


Monday, September 17, 2012

Story Telling Festival!

Miraculous, Magical Moments in Minutes has been invited

to the 7th annual STORY! Festival in Story City, Iowa.

 Saturday September 22, 2012 from 9-3 in the Story City Library located on Main Street.


There will be a showcase sampling of children's activiteis from the book that are quick, easy and made from items found around the house.

Books will be available for sale and can be signed by the author!

The book signing event will only be available on Saturday of this four day event.


STORY!  Festival - http://www.storyfestival.net/

Story City, Iowa contact information:
http://www.storycity.net
http://www.chamber@storycity.net

This would make a great family activity!

Hope to see you there!

Wednesday, September 12, 2012

Edible Creations!


What can you do with...

 a bag of marshmallows, a box of toothpicks and a huge supply of 

curious, vivid imagination?


Marshmallow towers, houses, skyscrapers, bridges, animals, people, etc.


Add diversity to your creation by using different colors and sizes of marshmallows.
Search the pantry for raisins, small candies, etc. to embellish your creation.

Start building on paper plates of different colors and patterns.
Add a paper flag to the top of a tower.

What else can you think of?

And remember, every great design requires a photo session before
you enjoy the gooey, "smushiness"of your marshmallow creation!